
Great Defaults for a Serverless Framework Project with TypeScript
02 Nov 2022In this article I will share my approach to starting a new project with the Serverless Framework and TypeScript. This includes good plugins and default configs that I’ve come to appreciate. If you know more good defaults that we should include, then please reach out on Twitter.
I am going to assume that you’ve already used the Serverless Framework and know how to deploy an app to AWS.
The focus of this article is for projects using TypeScript, but most of the setup can be used for other languages.
Create the project from a template
Run npm install -g @serverless/cli to globally install the latest CLI for the Serverless Framework.
You might have to use sudo to get the right permissions.
With the CLI installed, we run sls create --template "aws-nodejs-typescript" --name my-project-name --path my-project-path to
create a new TypeScript project. I’m using a template to get a basic structure, and also set the name and path immediately.
If you don’t include the path, the project will be created in the current directory and may pollute what you already have there.
You can always change the name later by modifying the serverless file (e.g. serverless.yml or serverless.ts) and the package.json.
You can see other available templates by running sls create --help.
Once you’ve done that, open the project in your favourite IDE. I use WebStorm from JetBrains.
Now let’s jump into the changes to the generated template.
Upgrade to Node16
Update: AWS has released Node18 runtime for Lambda since this article was published.
Since May 2022 Lambda supports Node16. Thus, we’re going to update the project to use Node16.
In the serverless file replace all occurrences of node14 with node16.
Here’s how I upgraded to Node16.
Do not Exclude The aws-sdk
By default, the TypeScript template excludes the aws-sdk dependency for esbuild. This reduces the bundle size, but may
lead to unexpected errors when the aws-sdk version on your local machine differs from the one that Lambda uses.
Yan Cui has good arguments against using the built-in aws-sdk:
- The built-in AWS SDK is often out-dated and missing security patches and bug fixes.
- It invalidates integration tests since the runtime uses a different version of the AWS SDK to what was tested.
- AWS can update the built-in AWS SDK without notice
In the serverless file, navigate to custom, esbuild, and then remove the property exclude.
Here’s how I removed the exclusion.
Configure Log Retention
By default, AWS CloudWatch will store your logs forever, which will slowly but steadily increase your AWS bill. Unless needed, I suggest you lower the log retention for your development stacks to 7 days.
To do this, we install a plugin to configure log retention: npm install -D serverless-plugin-log-retention.
Then include it in the serverless file, and add a number of days to retain the logs for.
Here’s how I configured log retention.
Once you leave your development stage, you can use parameters to configure defaults per stage.
Fine-Grained Permissions per Function
To achieve least-privilege for each function, we use the plugin serverless-iam-roles-per-function. Install it
with npm install -D serverless-iam-roles-per-function and add it to the serverless file.
Here’s how I added the permissions plugin.
We’re not going to set up permissions yet, but at a later point we would add them to a function as shown
by the excerpt of a function’s index.ts file below:
// ...

export default {
  // ...
  environment: {
    TABLE_NAME: {Ref: 'Table'},
  },
  iamRoleStatements: [
    {
      Effect: 'Allow',
      Action: ['dynamodb:Query', 'dynamodb:UpdateItem'],
      Resource: {'Fn::GetAtt': ['Table', 'Arn']}
    },
  ],
  // ...
};
Table refers to the CloudFormation ID of a table that we would later define in the serverless file.
Better API Validation Errors
The TypeScript template comes with API request schemas. If a request doesn’t match, it will fail with a generic error response.
To improve the error response, we’re going to update the ApiGateway’s error responses with CloudFormation:
resources: {
  Resources: {
    ApiGatewayRestApi: {
      Type: 'AWS::ApiGateway::RestApi',
      Properties: {
        Name: '${self:service}-${self:provider.stage}'
      }
    },
    GatewayResponseResourceNotFound: {
      Type: 'AWS::ApiGateway::GatewayResponse',
      Properties: {
        RestApiId: {
          Ref: 'ApiGatewayRestApi'
        },
        ResponseType: 'BAD_REQUEST_BODY',
        StatusCode: '422',
        ResponseTemplates: {
          'application/json': "{\"message\": \"$context.error.message\", \"error\": \"$context.error.validationErrorString\"}"
        }
      }
    }
  }
}
At the end of the serverless file add a new field called resources. In that field add another
field called Resources (notice the upper case). Within that add the CloudFormation code from above.
Here’s how I update ApiGateway to provide better error responses.
Stack Tags
Finally, we’re going to add tags to the stack. This makes working with the Cost Explorer easier, especially if you have multiple projects or CloudFormation stacks in the same account.
In the provider section of the serverless file add a property stackTags and add as many entries as you want:
// ...
stackTags: {
  projectGroup: 'trade-game',
  project: '${self:service}',
  stage: '${self:provider.stage}',
},
// ...
stackTags will apply the tags to every resource in the stack, including your tables and Lambda functions. You can later add more fine-grained tags to each new resource. I learned this from Jeremy Daly’s article “How to: Tag Your Lambda Functions for Smarter Serverless Applications” where you can also learn about best practices and limitations.
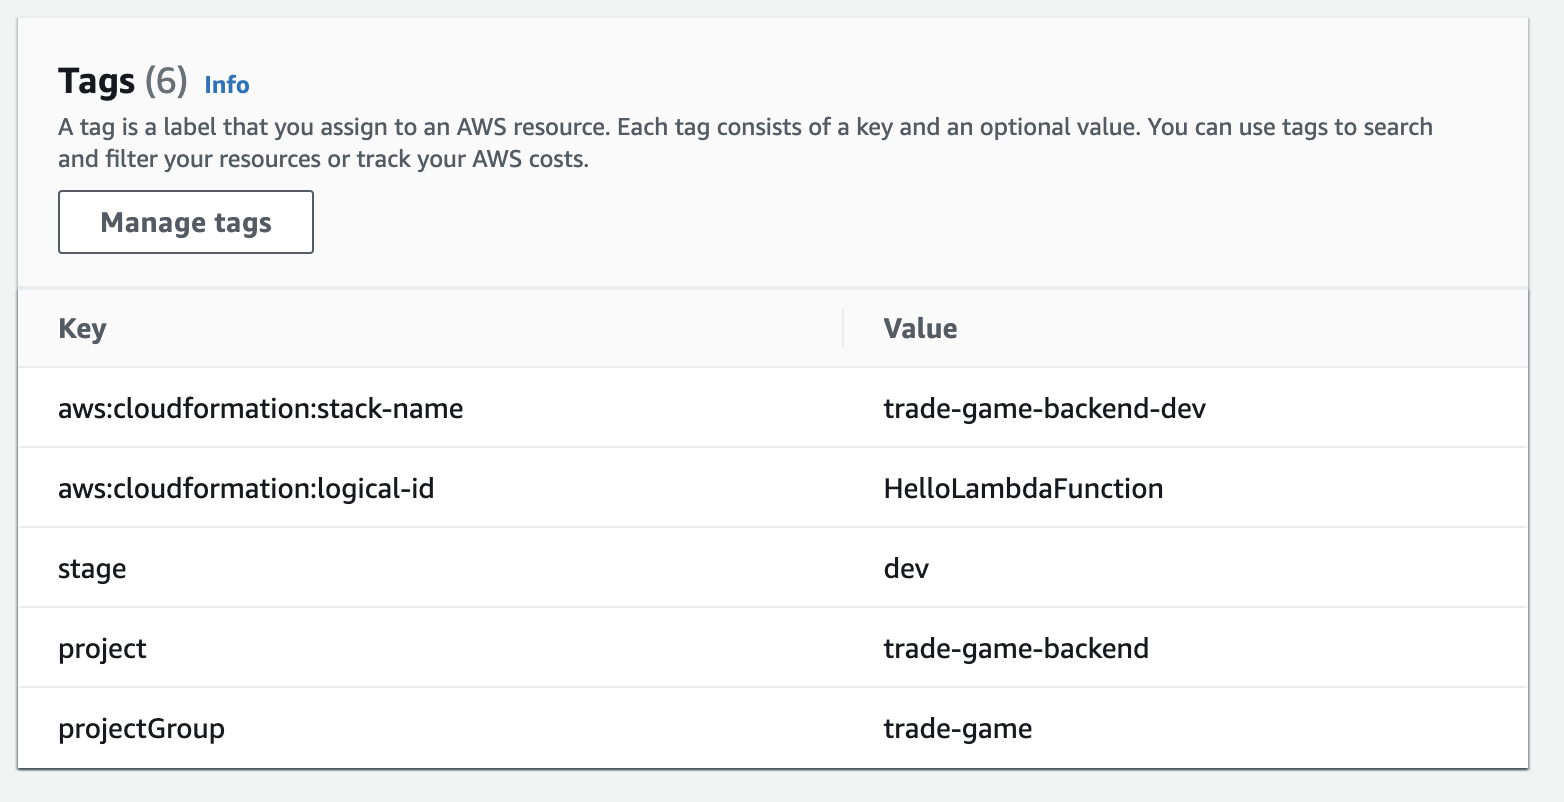
Here’s how I added tags to all resources.
Below you can see the result for a Lambda function:
Conclusion
In this article you’ve learned how to go from zero to a good default setup for a project with the Serverless Framework and TypeScript.
Your project now is a bit more stable, secure, and easier to debug.
You can see all the manual changes I did after creating the project by looking at this diff.
Enjoyed this article? I publish a new article every month. Connect with me on Twitter and sign up for new articles to your inbox!