
Partial Data Recovery with AWS DynamoDB Point In Time Recovery
01 Sep 2021Update 01. December 2021: AWS has released CloudWatch Evidently which you can use for the read only mode. Evidently lets you enable features through a visual switch, and doesn’t require you to change parameters.
It’s not always a full table delete that requires you to recover data. You may also find yourself in a situation where a bug in an application falsely changed or deleted records in your table that you would like to restore. This article explains
- how you can partially recover data,
- what you need to do now to prepare your application,
- what you should do when you discover an incident, and
- how you can recover data after you resolved the root cause.
We’ll use the term incident for the instant when the first records in your table are corrupted.
For when you need to restore the whole table and add it back to your application stack, check out Matthew Bonig’s guide.
Prerequisites
This article exclusively covers DynamoDB. You should also be familiar with IAM, as we’ll need to revoke permissions to force the application into read only mode.
You should also be able to rollback your application. Bonus points if you have a runbook how to safely roll back to a previous version.
How Does Partial Recovery Work
DynamoDB has a feature called Point In Time Recovery (PITR) where the service creates continuous backups , and retains them for up to 35 days. We can restore a PITR backup into a NEW table. You can’t restore the data into an existing table. Instead, you need to compare and patch records yourself. That’s what I’ll call partial recovery.
Partial recovery is especially interesting when we deal with large tables, where a full table restore would take significantly longer. With partial recovery we can decide to ignore GSIs during recovery and therefore lower the restoration time. We may also be able to keep the application running for customers that are not impacted by the bug.
With the approach covered in this article we will restore the table for a point in time when the bug didn’t affect records yet, and patch the broken records in our existing table. There are other options like a self-recovery mechanism in your application, that we won’t cover here.
Prepare Before An Incident Happens
With a partial recovery we will modify records in a live table without tearing it or its application down. To do this safely, you must be able to
- identify impacted records (unless you want to restore ALL records),
- put your application into a read-only mode,
- activate Point In Time Recovery for your tables, and
- have a dedicated role for your application so that you can prevent all write operations during recovery.
Below you will find some options to make your application ready.
Identifying Impacted Records
DynamoDB tables have a partition key (PK), and an optional sort key (SK), which identify an item in your table. When you want to restore a subset of your table, you’ll need to know which items were affected. Bonus points if you record how the item was modified (i.e. create, update or delete).
Option 1: Logging
The first approach is to log the item’s identifiers with the performed operation. Each log has a timestamp, with which you can later identify which items have been changed after a bug started impacting the application.
I recommend structured logging to make parsing your logs easier. Below you can find an example log entry.
{
    operation: itemChange
    timestamp: 183725623843
    ids: {pk: '123', sk: '456'},
    action: 'create'
}
This is the easiest approach to get started, because you only need a log message, as well as log groups that retain their messages for at least 35 days. The default log retention of CloudWatch is unlimited.
Option 2: Audit Log
The second approach is to set up an audit log table. To track changes in your audit log, you can enable a DynamoDB Stream and attach a Lambda function. This function persists the same information as we’ve seen in the example log message above into the audit table. You can then filter items by partition and timestamp to quickly retrieve the items that you want to restore.
You can activate the Time To Live (TTL) feature on the audit log table, and set the TTL attributes to 35 days as that’s the maximum what PITR supports. After that time the audit logs become useless for partial recovery.
Option 3: Timestamp Attribute
A third option is to track the last time an item was updated by adding a lastUpdatedTime attribute.
With this approach you however can’t see when an item was deleted, so I’m not suggesting that you use it.
Read-Only Mode
Activating a read-only mode when you discover an incident is important to prevent further problems. If your application breaks more records while you try to recover, you might never complete it.
I suggest you implement a read-only mode by taking away write permissions from your application. Not only your users can trigger changes in your system, but background jobs might do that as well. If your application doesn’t have the permission to change records any more it won’t damage any further items. You can still patch broken items by using a different role with write permissions.
Below is an example IAM policy that you can attach to your applications’ role to deny write access.
{
  "Version": "2012-10-17",
  "Statement": [
    {
      "Sid": "RevokeWritePermission",
      "Effect": "Deny",
      "Action": [
        "dynamodb:PutItem",
        "dynamodb:UpdateItem",
        "dynamodb:DeleteItem"
      ],
      "Resource": [
        "*"
      ]
    }
  ]
}
You might not need to revoke read access, and as a result your customers can continue viewing data in your application. An API that gracefully handles the lost permission and delivers a non-technical message to your user is a nice to have.
Here’s a TypeScript example how you can implement a read-only check in your API using the AWS Parameter Store.
import {SSM} from 'aws-sdk';
const ssm = new SSM();

// Parameter needs to be of type StringList.
// I'm excluding the conversion into a string[].
const readOnlyCustomers: string[] = await ssm.getParameter({
    Name: 'read-only-customers',
}).promise();

// Assuming your input contains a field called "tenantId"
// we can isolate read-only mode for some customers
const tenantId: string = input.tenantId;

if (readOnlyCustomers.includes('all')
    || readOnlyCustomers.includes(tenantId)) {
    return {
        statusCode: 503,
        body: 'Service is currently in read-only mode'
    }
}
What To Do When An Incident Happens
First, take a deep breath. Check what resources you have at your disposal, loop in another engineer, and grab a glass of water.
Activate Read-Only Mode
Start by activating the read-only mode to prevent further damage. If you can quickly identify the affected customers, you can limit the read mode to them. In case of doubt just enable it for all, and lift partially later. Also revoke write permissions to your table by adjusting the IAM roles for your applications. You’ll need to keep write access for the role you’ll recovery records with.
Update The Read-Only Parameter
We’ll assume that you previously created a parameter called read-only-customers and added logic to your code to check for this parameter.
Navigate to AWS Systems Manager, then Parameter Store, and then edit the parameter read-only-customers.
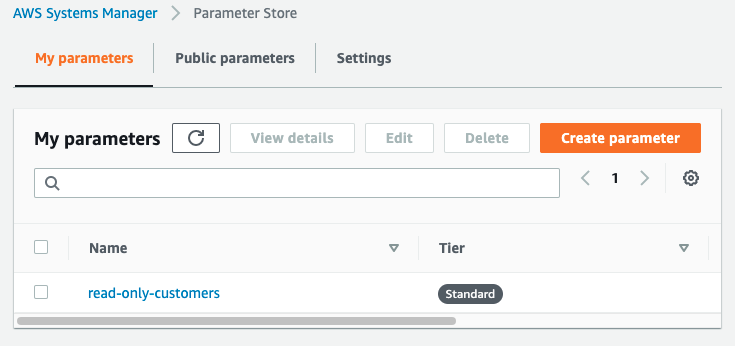
In the edit screen, replace your default value with all to reject requests from all customers.
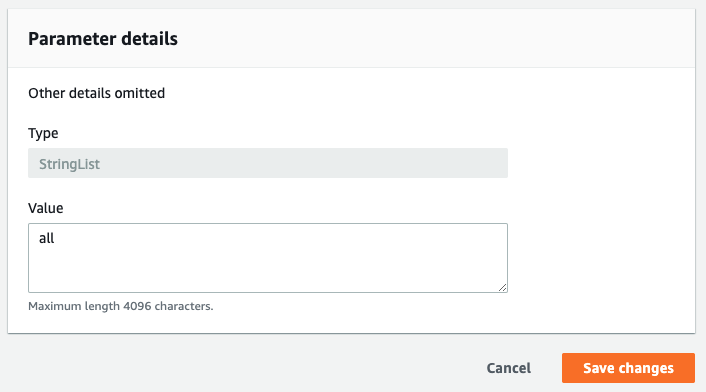
Your application should now reject requests before trying to let them write to DynamoDB.
When you want to lift the read-only mode at the application level, you need to change this parameter back to your default value (e.g. none).
Update The IAM Roles
We’ll assume that you have an existing IAM role for your application, with a policy that allows writes to your DynamoDB table.
To remove write access, we’ll attach an additional Deny policy to your application’s role. IAM first looks at Deny policies.
If we have both an Allow and a Deny for an operation, it will be rejected.
Create the Deny policy if you haven’t done so yet. If you’re in a rush, you can also go the application’s role, and create an inline policy.
{
  "Version": "2012-10-17",
  "Statement": [
    {
      "Sid": "RevokeWritePermission",
      "Effect": "Deny",
      "Action": [
        "dynamodb:PutItem",
        "dynamodb:UpdateItem",
        "dynamodb:DeleteItem"
      ],
      "Resource": [
        "*"
      ]
    }
  ]
}
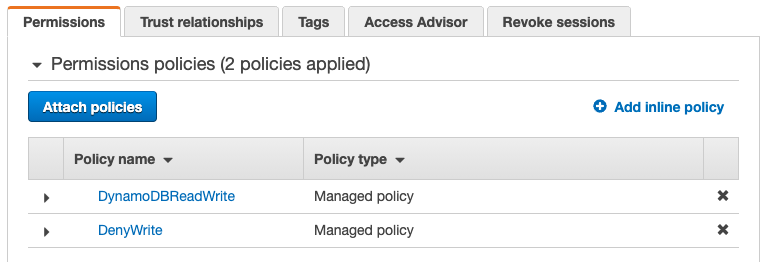
Now open your application role, where amongst others you should have a DynamoDB policy that allows read and write.
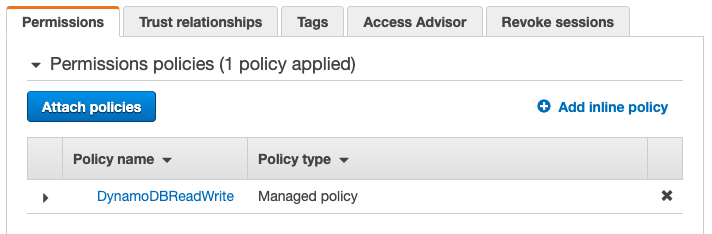
Click on “Attach policies”, and find the Deny role. In our example it’s called DenyWrite. Select and attach it.
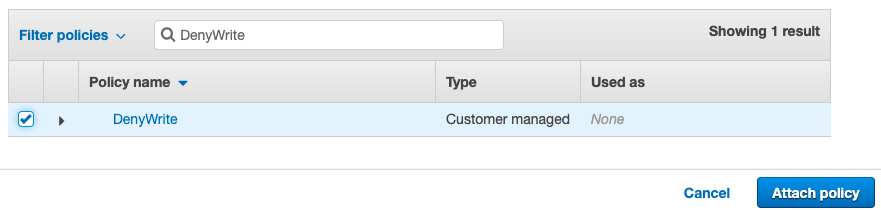
In the role’s overview you should now see two policies, one for allowing read-write operations and one for denying write operations. The result is a read-only mode enforced at the IAM level.
When you want to lift the read mode, you need to detach the Deny policy from your application role.
Start Table-Recovery
The next step is starting a table recovery. This will not change your existing table, but create a new one with the data from a previous point in time. The recovery might take a while, so it’s better to start it early.
Important: You’ll need to know when the first records were corrupted, so you can restore a version where everything’s been intact.
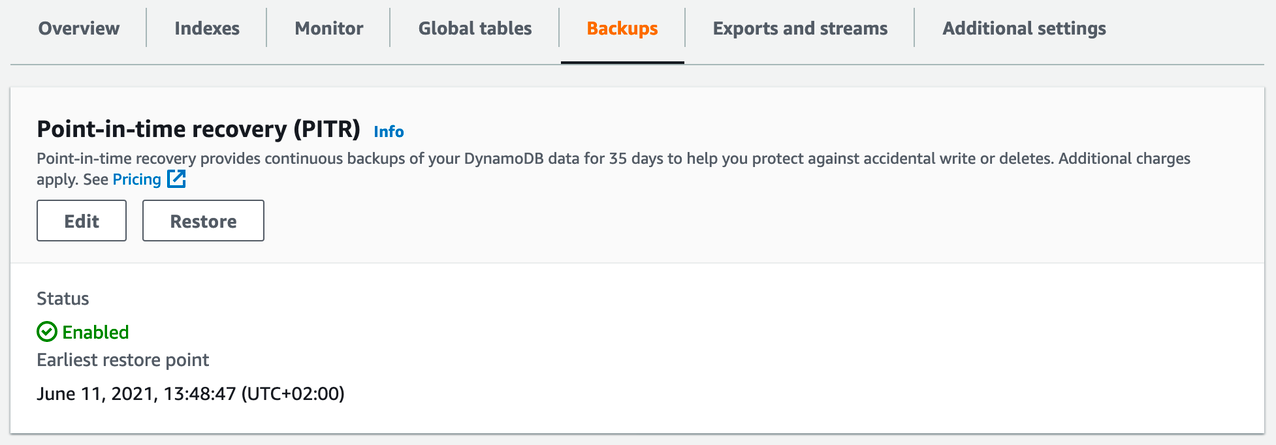
Go to the DynamoDB table, and open the Backups tab. Here you’ll see a Restore button, and the earliest restore point.
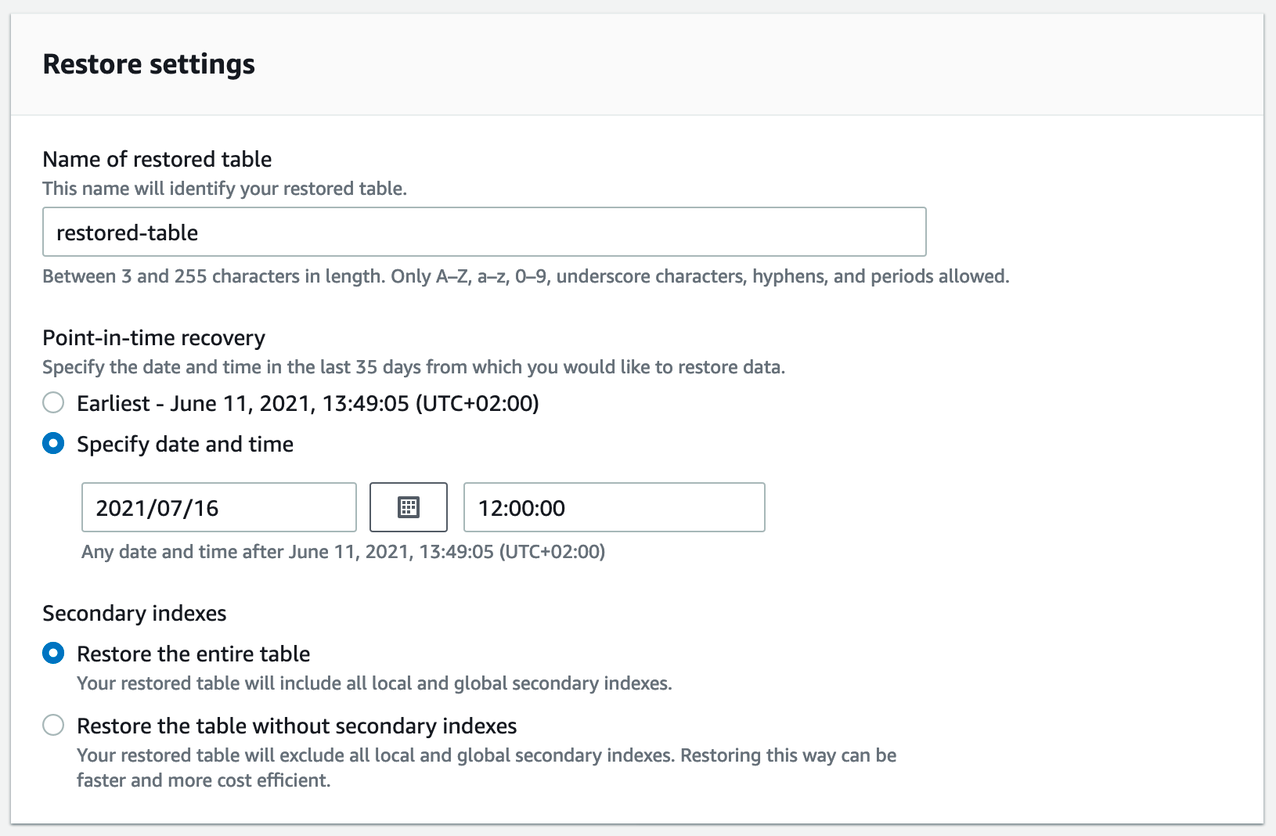
After clicking on the Restore button, you can configure how the table should be restored. The most important part is the date. It must be before, but should be close to the time when the first records were corrupted. Don’t worry if you mess this up, you can retry and patch records again.
You may choose to restore the table without secondary indexes. Unless you know that you won’t need them, I suggest going with the default of restoring the entire table. Restoring the table without secondary indexes (LSI, GSI) can be faster. You’re not limited to one option, but can choose to start two recoveries with different options.
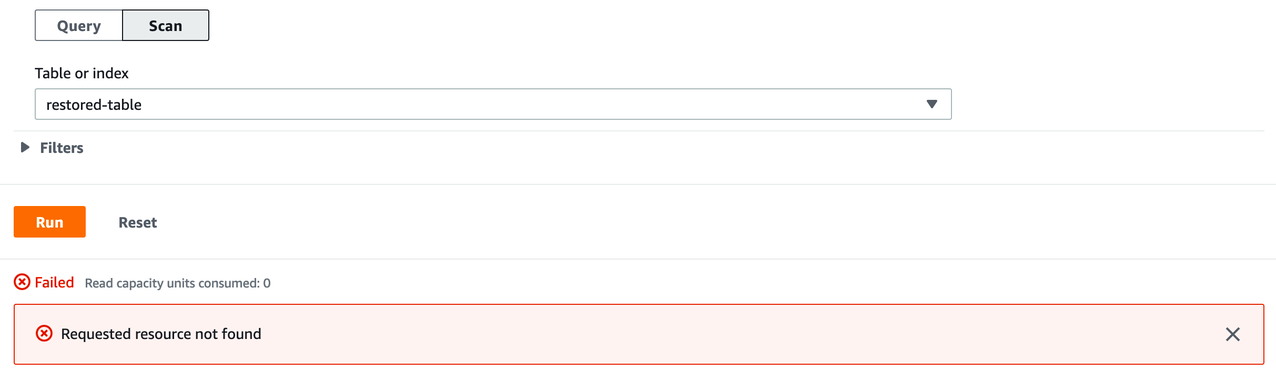
Shortly after you started the recovery, a new table will appear in the DynamoDB console. Until the recovery has been complete, you’ll see error messages when querying or scanning the table.
While the backup recovery is in progress, you can start rolling back the broken application.
Application Rollback
As mentioned in the prerequisites, this article expects that you know how to roll your application back. Once you lift the read-only mode, we don’t want to break further items in our database.
Recovering Data After The Incident Happened
Assuming you started a PITR recovery, you should soon (minutes to hours) be able to see first items in the recovered table.
While DynamoDB restores the table, you can compile a list of items that you need to recover. In the best case there are just a few items, or partitions that you need to recovery. In the worst case you need to scan the whole table. In that situation a full table recovery might be faster. It’s more brute force, but you’re not going to have bugs in a patch script.
Restored the table, and know which items you want to recover? Great! You can now execute a script that replaces broken records with their correct counterpart from the recovered table. Below is an example for TypeScript.
import {DynamoDB} from 'aws-sdk';
const ddb = new DynamoDB();

const sourceTable = "restored-table";
const targetTable = "my-production-table";

// you can also load them from another source
// like a file or another ddb table
const impactedRecords = [
  {
    pk: "tenant-1",
    sk: "document-1",
  },
];

async function runMe() {
  for (const impactedRecord of impactedRecords) {
    const item = (
      await ddb
        .get({
          TableName: sourceTable,
          Key: impactedRecord,
        })
        .promise()
    ).Item;

    await ddb
      .putItem({
        TableName: targetTable,
        Item: item,
      })
      .promise();
  }
}
Run this script with one or two items to verify that it works correctly. Remember that you can rerun it if the result is not what you expect, but be careful to first identify all broken records before you run your script.
Lift The Read-Mode
Finally, lift the read-mode by removing the read-only-customers parameter and remove the Deny statements from the application’s IAM role.
Conclusion
Partial recoveries can help you fix broken records in your DynamoDB table without taking the whole application down for maintenance. It does however come with prerequisites such as identifying impacted records, and a read-only mode.
For a full table recovery, you need to replace the old table with the new one. Matthew Bonig describes how you can use CDK to import DynamoDB tables to existing CloudFormation stacks.
Resources
Enjoyed this article? I publish a new article every month. Connect with me on Twitter and sign up for new articles to your inbox!