
How to use S3 to share media with your friends
07 Jan 2020In our recent winter holiday we had a GoPro, a drone and some more cameras. In total we gathered ~600GB of footage which was way too much for the home servers some of us had. So we decided to use AWS’ file storage service S3 to collect and share all that media. This guide shows you how to set up a bucket and user so that your friends (also the non-technicals) can use an infinitely scalable storage solution.
Did a friend of your send you here to learn how to use the bucket? Scroll down to “Usage”!
Pricing
Depending on how much data you upload, S3 won’t come for free. Visit the S3 pricing page for more details.
As a rule of thumb I’ll go with 0.025$ per GB (Frankfurt pricing + some buffer for data transfer). That puts us at 0.025$/GB/Month * 600GB = 15$/Month.
If you want to keep your data in the cloud for a longer time you should look at other S3 storage types likes “S3 Standard — Infrequent Access”.
Setup
The great thing about this approach is that it’s serverless. AWS takes all the burden of running and updating servers from you so that you can focus on what you wanted to do in the first place: Share files.
Create a bucket
We’ll start with creating an S3 bucket. Head over to the S3 management console and create a bucket. You can keep all the default settings (especially blocking public access). Remember the bucket’s name for the next steps.
Create a policy
Head to the IAM policy overview and click on Create Role.
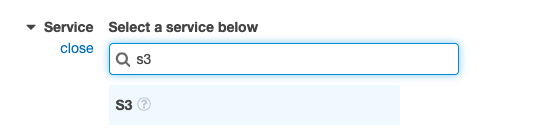
Let’s start by selecting the S3 service.
The next step is to grant the necessary permissions:
-
PutObject (to upload files)
-
ListBucket (to see the files in the bucket)
-
GetObject (to download files)
-
Optional but recommended: DeleteObject and DeleteObjectVersion (to allow for deleting files)
Don’t click on “All S3 actions” as that will grant anyone with that permission to look into ALL your buckets and do EVERYTHING they want with them.
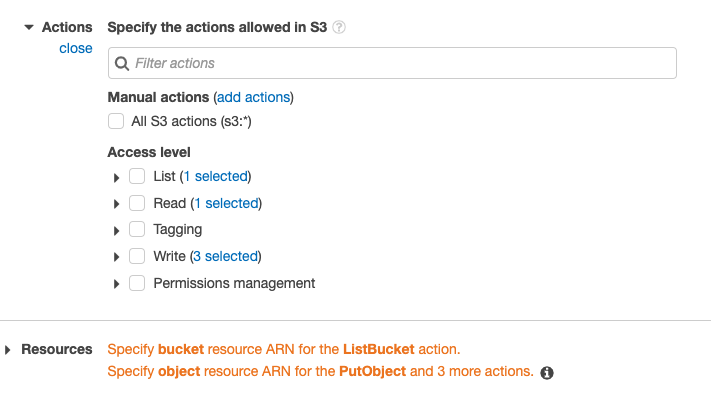
You have probably noticed the Resource warnings. That’s where we’ll go next to define what resources those permissions may be used on.
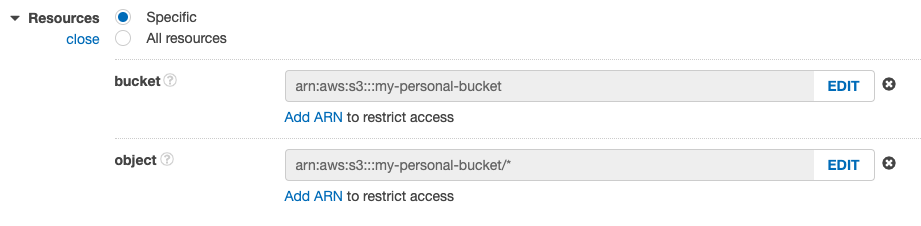
Click on “Add ARN” under bucket and add your bucket. Click on “Add ARN” under object and add your bucket plus a * wildcard to allow everyone with that user to access and edit all the files within this single bucket. You may extend this with more users and limit each one to only write in their own folder. Ask in the comments if you don’t know how!
Now we can just click next until we created the policy.

Create a user
The next step is to create a user which gets only the policy we just created. Again go to the IAM service and in the lefthand navigation go to Users and create a new one.
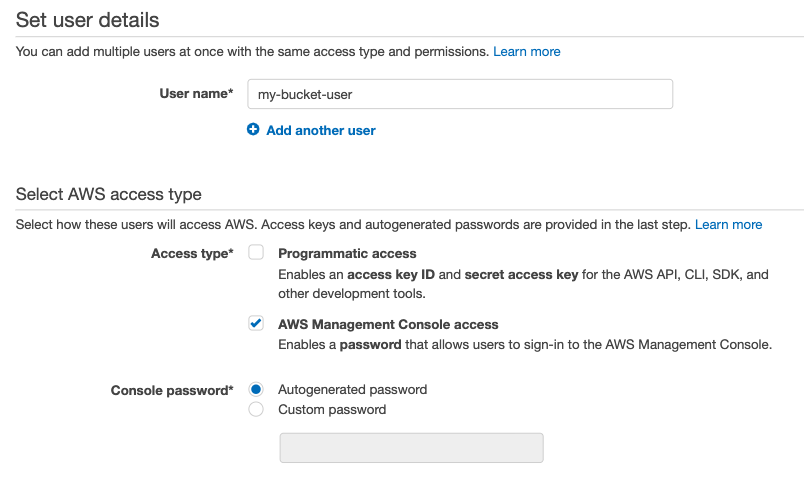
We’ll name our user something convenient that we’ll remember and give it AWS Management Console access so that the user may log in to the web interface. You can let AWS generate a password for you or pick your own one. Please make it a secure one!
We’re nearly done. Make sure to attach the recently created policy to the user.
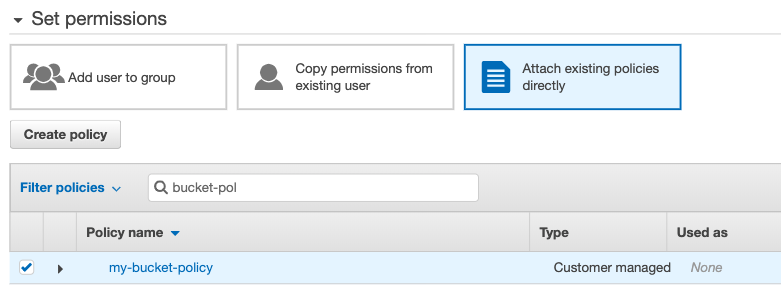
Click on next and you should be done.
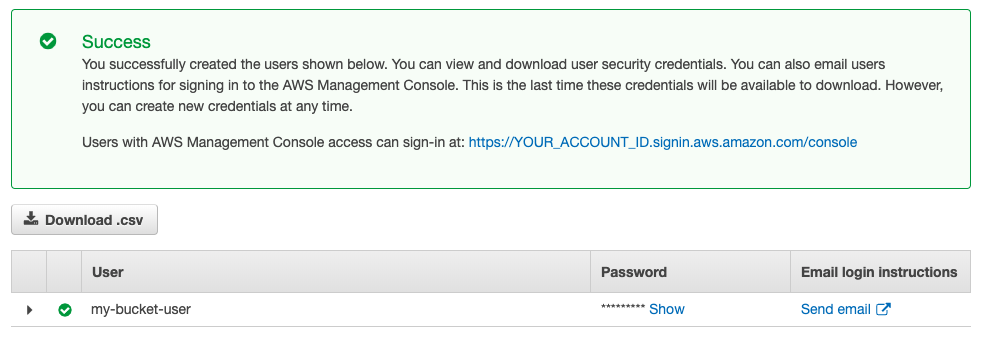
Don’t close the success window just yet, we need to copy a few things for your friends:
-
Bucket URL: https://s3.console.aws.amazon.com/s3/buckets/YOUR_BUCKET
-
Account ID: Take this from the success message URL above (I’ve replaced mine with YOUR_ACCOUNT_ID)
-
User: The username you selected in the last step, which is also shown below the success message (e.g. my-bucket-user).
-
Password: Click on Password > Show to reveal the auto generated password.
With that information they should be able to access your bucket and upload/download all the files they have/want.
Usage
You should have received a bucket URL, a user and a password. Open the bucket URL in your browser and enter the credentials.
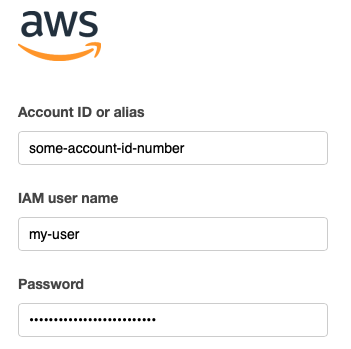
Click on Sign In to open the bucket.

To upload a new file or folder just drag it into the bucket. On the dialog that pops up just click “Upload”.
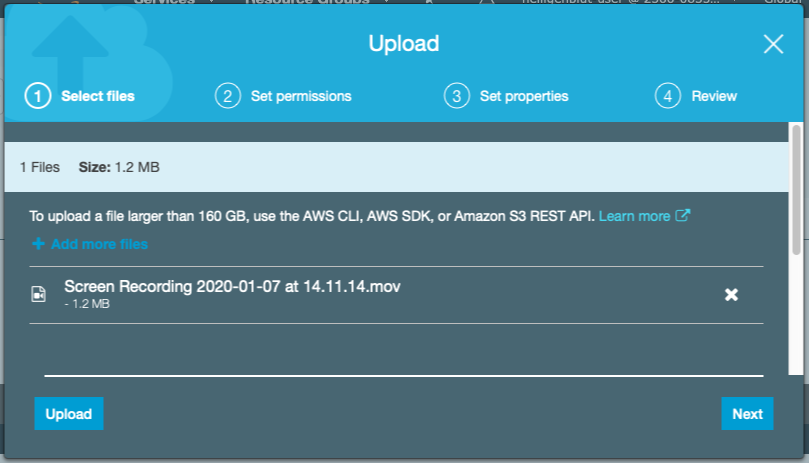
Depending on the size of your files it might take a while to complete. You can start uploading/downloading other files in the meantime.

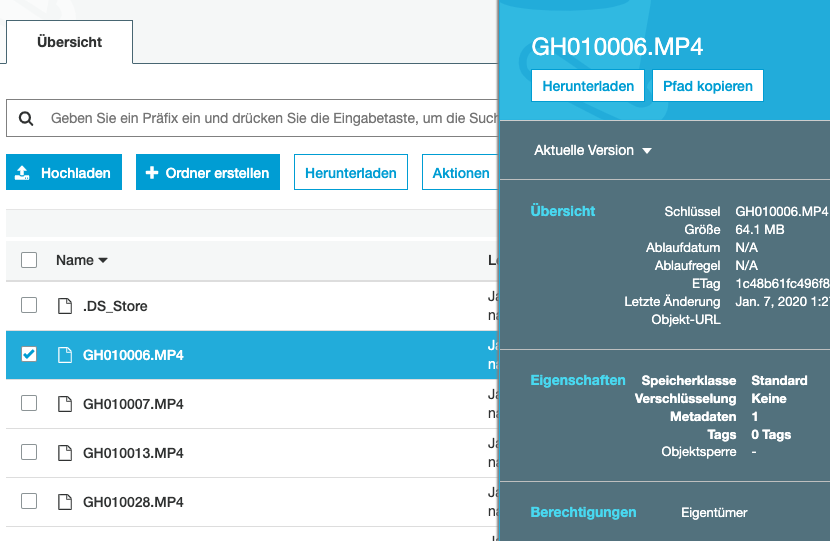
Downloading a file is a bit trickier. Instead of just double clicking it or opening the Object-URL, you have to open the file’s details and click on Download. Depending on where you click you’ll see a dialog or be redirected to the file’s details. In any case a download button should be visible.
Currently there seems to be no option to download a whole folder from the AWS S3 console. If you don’t want to individually download files, please ask your friends to zip the files first.
Enjoyed this article? I publish a new article every month. Connect with me on Twitter and sign up for new articles to your inbox!