
Scheduling irregular AWS Lambda executions through DynamoDB TTL attributes
29 May 2019Update: In November 2022 AWS has released the EventBridge Scheduler. It does what I expect from a serverless scheduler, and has a free tier of 14 million invocations per month.
Introduction
This article describes a serverless approach to schedule AWS Lambda invocations through the usage of AWS DynamoDB TTL attributes and streams. At the time of writing there was no way to schedule an irregular point of time execution of a lambda execution (e.g. “run this function once in 2 days and 10 hours and then again in 4 days”) without abusing CloudWatch crons (see Alternatives for more info).
hey @awscloud! is there a way to trigger a #lambda execution at a future point in time without abusing rate/cron from #CloudWatch or ttl from #DynamoDB? e.g. call this function in 2 hours and this function in 3 days, 7 hours and 15 minutes
— Michael Bahr (@bahrdev) May 27, 2019
This approach scores with its clean architecture and maintainability. It only requires a function to insert events into a scheduling-table and a function that processes events that hit reach the scheduled point of time. As we build everything on serverless technology, we don’t have to run software upgrades, maintain firewalls and pay for idle time. At low usage it’s practically free and even with higher usage we only really start paying once we schedule hundreds of thousands of events per day. Read more in this follow up article.
While this approach allows one to schedule an execution for a certain time, it falls short on accuracy. In our tests with a scheduling table holding 100.000 entries, the events appeared in the DynamoDB stream with a delay of up to 28 minutes. According to the docs it may take up to 48 hours for especially large workloads. Therefore this approach does not fit, if you require the function to be executed at a certain hour, minute or second. Potential use cases are status updates which run every couple hours or days or non time critical reminders.
The source code for the lambda functions is available at GitHub.
Approach
Our approach is to use a lambda function to create scheduling entries. These entries contain the payload for later execution and a time to live attribute (TTL). We then configure the DynamoDB table to delete items after their TTL has expired and push those changes, including the old entry, to a stream. The stream is then connected to a lambda function which processes the changes and executes the desired logic. The functions are written with Python 3.7.
The executor function may reschedule events by performing the same logic as the scheduler function.
In this guide we will
- setup the table and stream,
- the executor which consumes the stream,
- a little function to schedule events and
- deploy it to AWS with the serverless framework (version 1.32.0).
You can change the order of the steps, but should keep in mind that the executor requires the stream’s ARN.
Table Setup
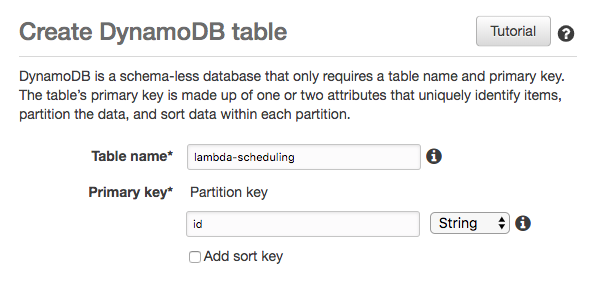
Start by creating a new DynamoDB table.
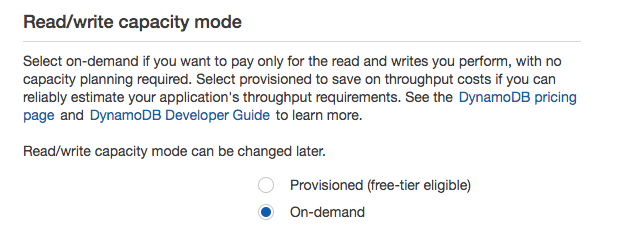
If you expect to exceed the free tier, we recommend switching to on-demand. Please not that exceeding a provisioned capacity may lead to DB operations being rejected, while on-demand is not limited.
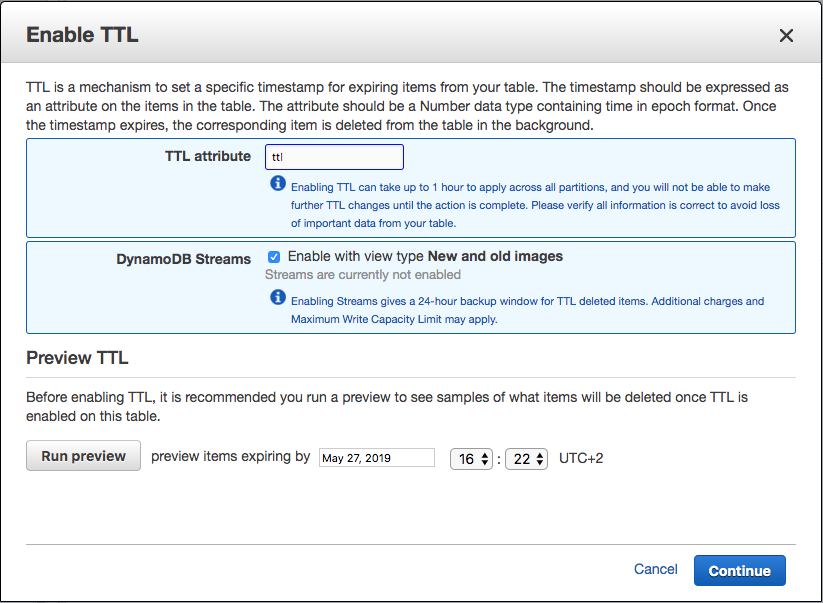
This will open a dialog where you specify the TTL attribute and activate DynamoDB Streams. We will use the attribute name “ttl”, but you may choose whatever name you like that is not reserved by DynamoDB. Click on Continue to create enable the TTL.
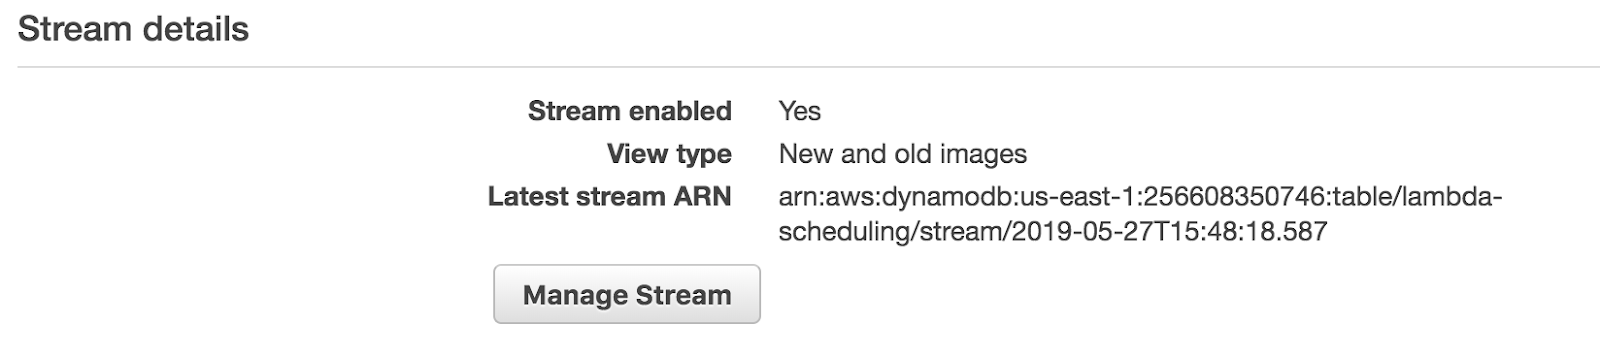
Once DynamoDB has created the TTL and stream, you will see the stream details on the table overview. We will later need the “Latest stream ARN” to hook it up to our executor function.
Executor
Next we write an executor function in Python which consumes the stream events.
def handle(event, context):
    print('Received %d records' % len(event['Records']))
    for record in event['Records']:

        # as we're using ttl to schedule executions, we do not care about inserts or updates,
        # only about removes which happen after the ttl is hit
        event_name = record['eventName']
        if event_name != 'REMOVE':
            print('Skipping %s' % event_name)
            continue

        # note that this image is in DynamoDB style, not a regular python object and needs to be converted accordingly
        old_image = record['dynamodb']['OldImage']
        print(old_image['payload'])
A few things to keep in mind here:
-
Line 2–3: You may receive more than one record. Therefore your function must finish before the configurable lambda timeout is reached.
-
Line 7–10: You will receive events that are unrelated to the TTL deletion. E.g. when an event is inserted into the table, the event_name will be INSERT.
-
Line 13: The record’s structure differs from the entry we wrote to the DynamoDB table. You need to access Records, then dynamodb and finally OldImage to get the database entry as it was before deletion. Note that the payload follows DynamoDB’s AttributeValue schema shown below:
Scheduler
You may create new entries manually through the DynamoDB management console or through scripts. In this example we will write an AWS Lambda function in Python which creates a new entry.
import boto3
import time
from uuid import uuid4

# keep the db initialization outside of the functions to maintain them as long as the container lives
dynamodb = boto3.resource('dynamodb', region_name='us-east-1')
scheduling_table = dynamodb.Table('lambda-scheduling')

def delay():
    return 10

def handle(payload, context):
    print(payload)
    id = str(uuid4())
    ttl = int(time.time()) + delay()
    item = {
        'id': id,
        'ttl': ttl,
        'payload': payload
    }
    scheduling_table.put_item(Item=item)
Please check that line 8 of the scheduler has the table name you specified during the table setup.
All that this function does, is to create a database entry with an id, a payload and a TTL attribute. The payload may be a dict, array or plain value. The ttl is measured in seconds since the epoch. We use the function *delay()
The put_item from line 24 will cause an INSERT event to be pushed to the stream. According to line 8 of the executor we ignore INSERT events.
Deployment
To deploy the functions, we use the serverless framework. Here is the serverless.yml, which specifies the desired resources:
service: lambda-scheduler

provider:
  name: aws
  runtime: python3.7
  iamRoleStatements:
    - Effect: Allow
      Action:
      # Please limit the Actions to read and write if you use this in production
        - dynamodb:*
      # Limit this to your lambda-scheduling table
      Resource: "arn:aws:dynamodb:us-east-1:*:*"

functions:
  schedule:
    handler: scheduler.handle
  execute:
    handler: executor.handle
    events:
      # Use your lambda-scheduling stream
      - stream: arn:aws:dynamodb:us-east-1:256608350746:table/lambda-scheduling/stream/2019-05-27T15:48:18.587
From line 3 to 12 we specify the provider (AWS), the runtime (python3.7) and grant permissions to our lambda functions. Here we only need write and read access for the scheduling table. You may extend the roles depending on what your scheduler and executor do.
Lines 15 to 16 set up the scheduler. This function is not available publicly, but only through the lambda management console. You may extend it to run regularly or be available through an AWS ApiGateway endpoint.
Lines 17 to 21 set up the executor. Through events we specify that the executor should be invoked when an event is pushed to the stream. Here you should replace the example with the name of your stream from the table setup.
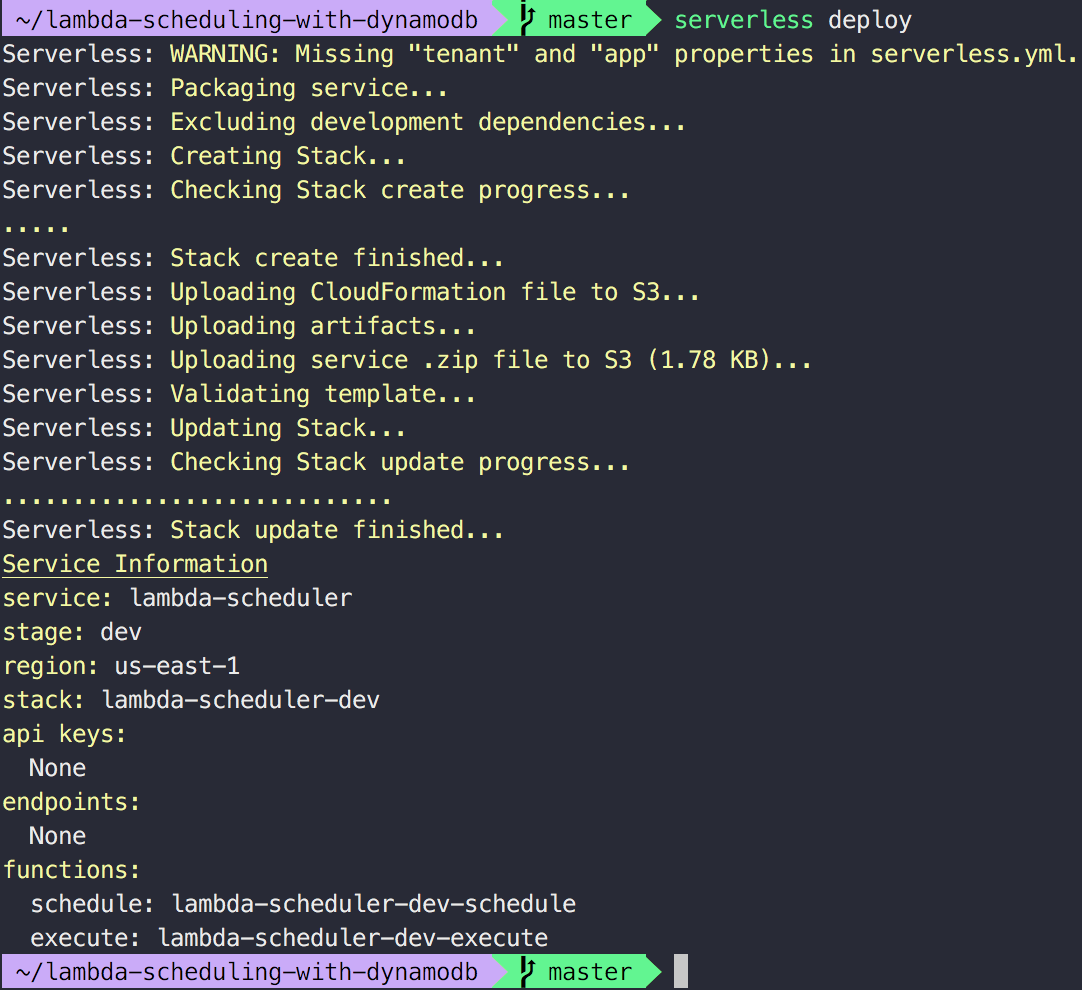
Once you adjusted the serverless.yml to your needs, deploy it by running serverless deploy from the folder where the serverless.yml and functions are located. This may take a few minutes to complete.
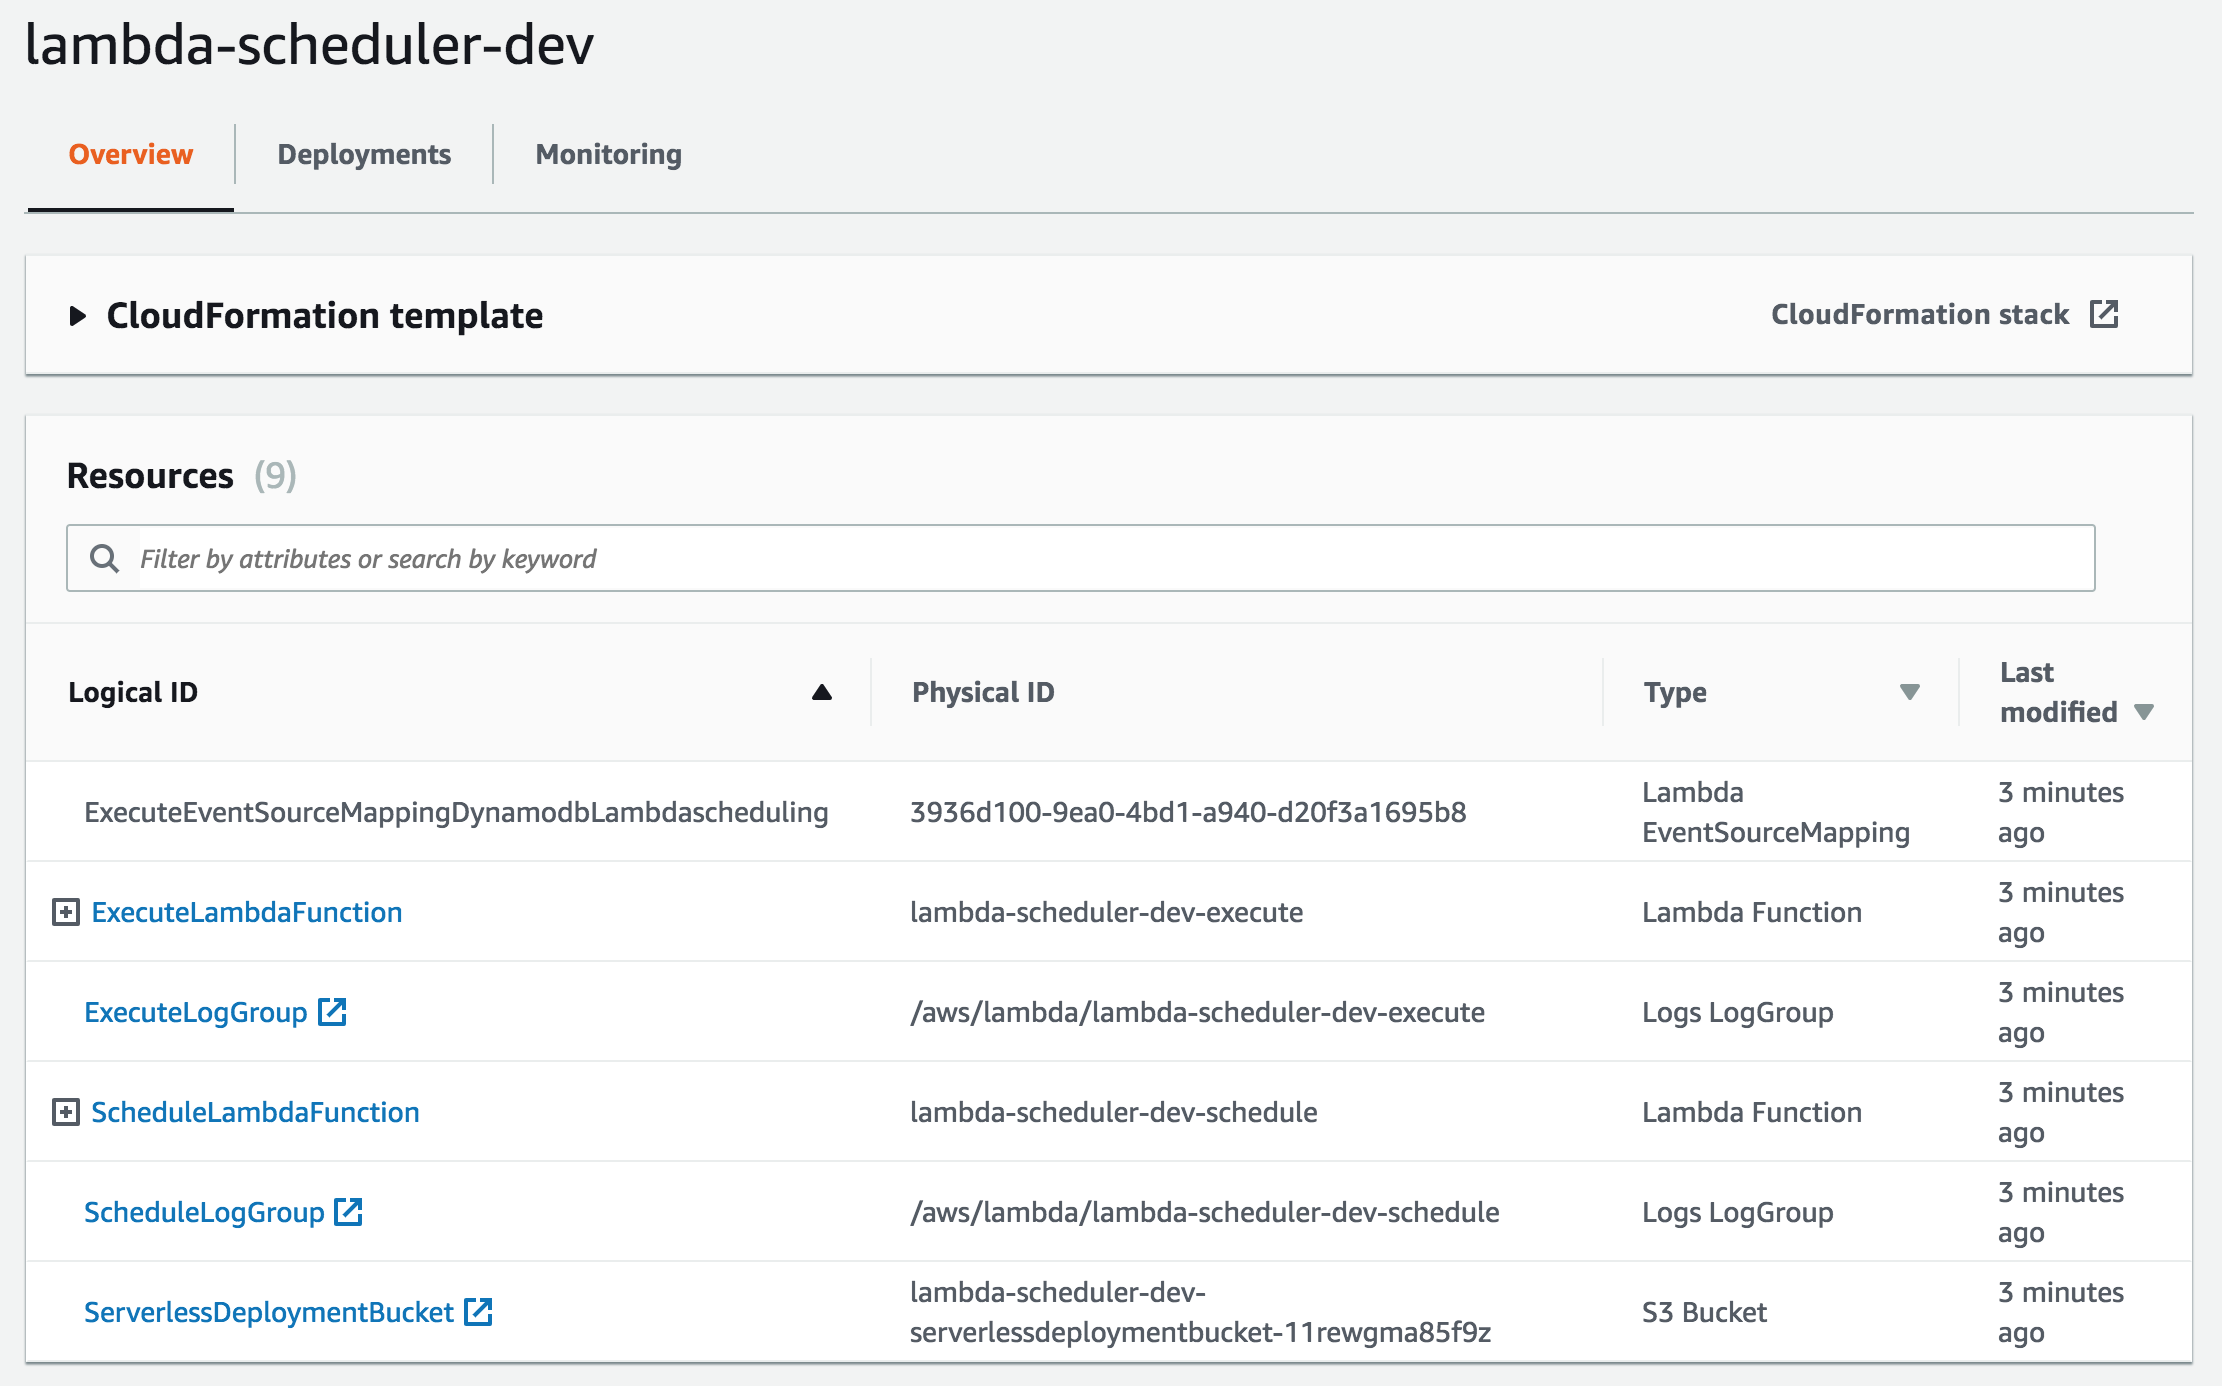
Test
Once serverless completes the deployment, head over to the lambda management console and click on ScheduleLambdaFunction.
In the top right corner you can then configure a test event.

As we don’t evaluate the input of the scheduler function the default Hello World event is sufficient.
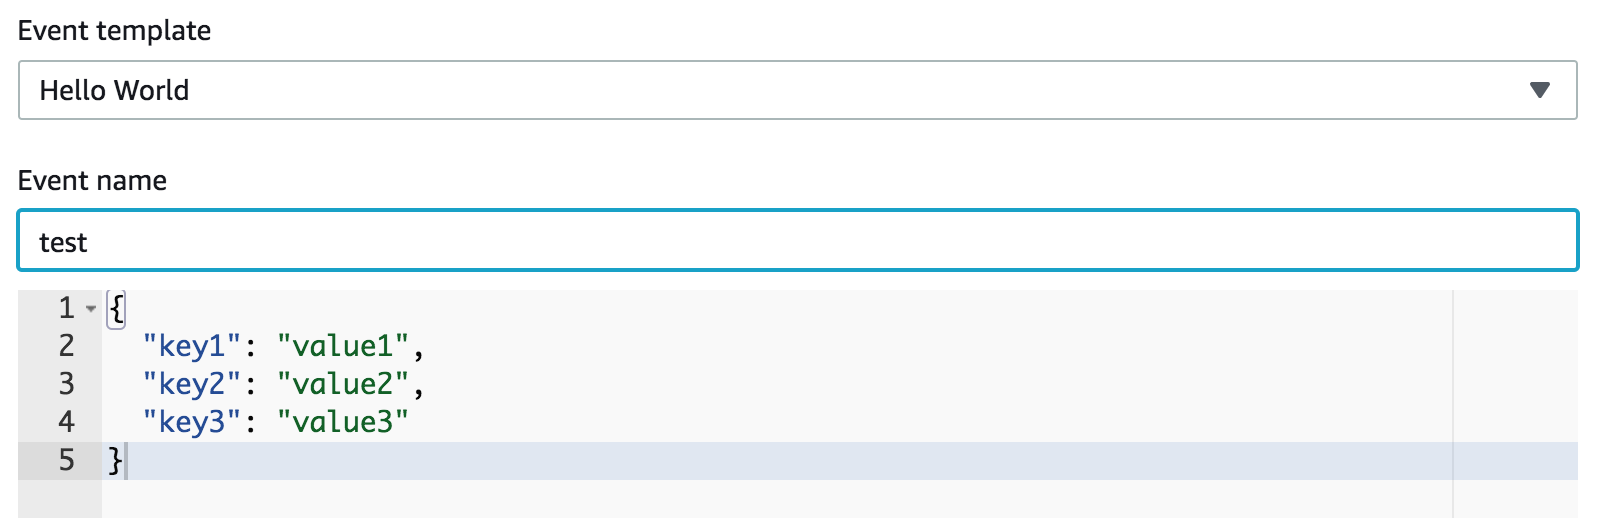
Create the test event and then execute it by clicking on Test.

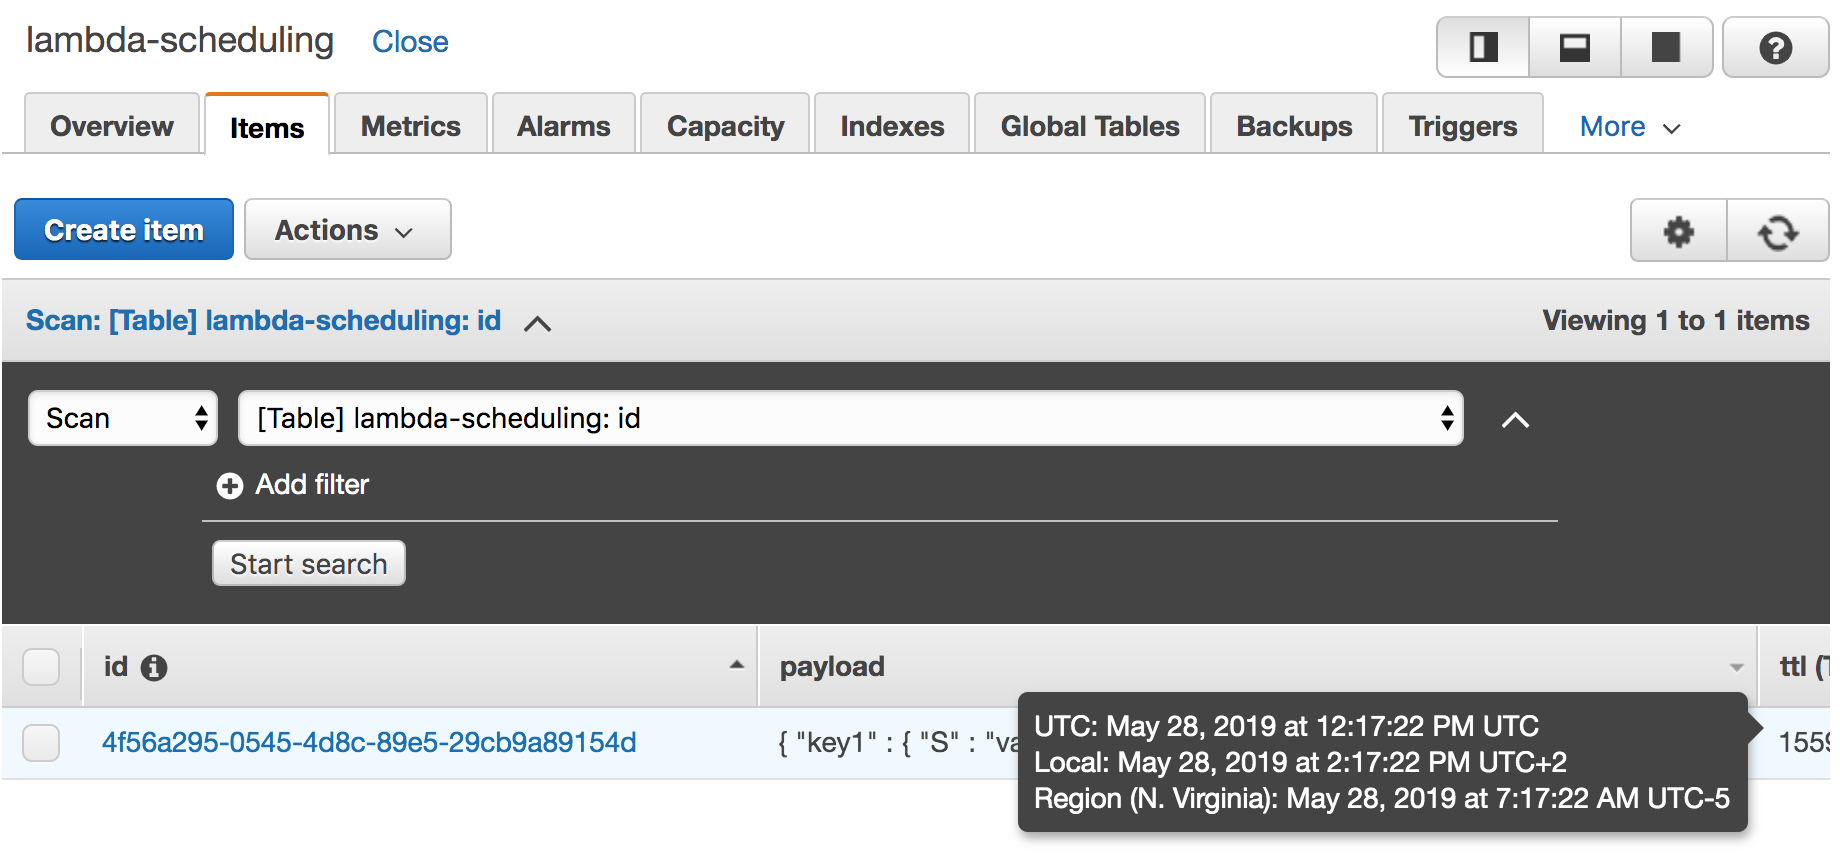
Now head over to the DynamoDB management console and open the items of your table. When you hover over the TTL attribute you will see an overlay which tells you when the entry is supposed to be deleted (remember that the deletion may be delayed).
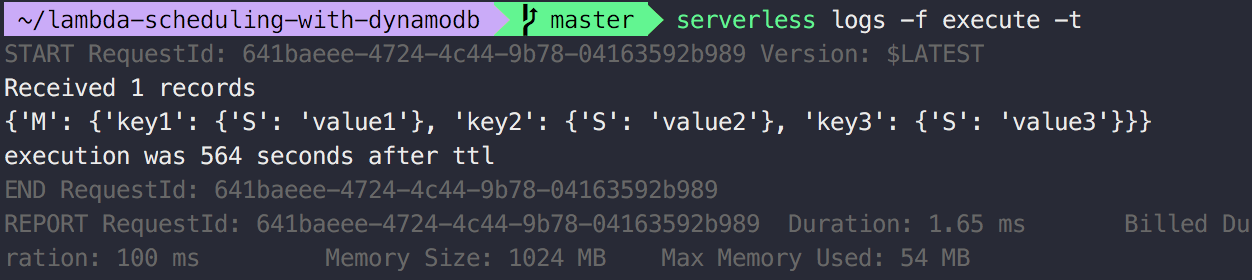
Now we have to wait until DynamoDB deletes the entry. As DynamoDB will probably take a few minutes we are in no rush here. Switch back to the console where you deployed the serverless application and run the command serverless logs -f executor -t to listen for new logs of the executor function. Get yourself a drink and a snack as this will probably take 10 to 15 minutes for a small table. If you created 10.000.000.000 entries, then you might have to wait longer.

That’s it! We invoked a single lambda execution without the use of rate or cron.
What’s next?
From here you can play around with the example and try a couple things:
-
Modify the delay e.g. by using Python’s
random.randint() -
If you are using this approach to schedule a lot of executions (read: more than 100 per day), you should look into optimising the resources of your functions away from the default of 1GB RAM. You can do this by glancing over the logs and looking for the RAM usage, then estimating a number that will fit for all those executions or by using the AWS Lambda Power Tuning tool to estimate the perfect fit.
-
Let the executor reschedule the event by adding another database entry for a future execution. My project does status updates and then reschedules the execution if the desired status did not match yet.
-
Extend the approach for multiple executors, by specifying another field with ARN of the desired executor, and then writing a new delegating executor which invokes the desired ARN.
Housekeeping
Should you decide to use this approach for your project, make sure to check off a few housekeeping tasks:
-
Monitor the delay between the defined TTL and the actual execution. The example code prints a log entry that you can use to visualize the delays.
-
Optimize the granularity of the permissions in the serverless.yml file. Aim for the least amount of privileges.
-
Define a log retention for the generated CloudWatch log groups. You probably don’t want to rake up costs as time passes and log storage increases.
-
Tag the resources for cost analysis so you are later able to identify where major cost producers come from.
-
Set up an AWS Budget to prevent billing surprises.
Alternatives
The approach above is not the only way to schedule irregular executions, but feels the cleanest to me if you need to pass a payload to the lambda function.
CloudWatch PutRule API
If you have a limited amount of scheduled invocations, you can use the CloudWatch PutRule API to create a one time cron execution.
cron(23 59 31 12 ? 2019)
This cron will execute on the 31st of December 2019 at 23:59.
The downside of this approach is that you can’t create more than 100 rules per account and have to clean up expired rules.
EC2 Scheduler
You can spin up an EC2 that runs a scheduler software, but this requires additional costs for the EC2 instance and does not fit the serverless goal of this article.
Summary
In this article we looked at an approach to schedule irregular lambda invocations and learned about its implementation and limitations. If you use this approach, then beware of the delays and monitor them.
What are your thoughts? Do you have a better approach or know how to achieve this on a different cloud provider? Share it!
Further Reading
-
Cost Analysis: Serverless scheduling of irregular invocations
-
Yan Cui’s take on DynamoDB TTL as an ad-hoc scheduling mechanism
-
More suggestions on scheduling mechanism by Zac Charles
Enjoyed this article? I publish a new article every month. Connect with me on Twitter and sign up for new articles to your inbox!