Efficiently tagging existing AWS resources
03 Jan 2020This guide is for you if you have a bunch of untagged AWS resources and want to understand your bills better.
Already familiar with Cost Explorer and tags? Skip to “Is there a more efficient way?”
If you’ve been using AWS for a while, you’ve probably noticed that pricing and understanding your bills is more complex here.
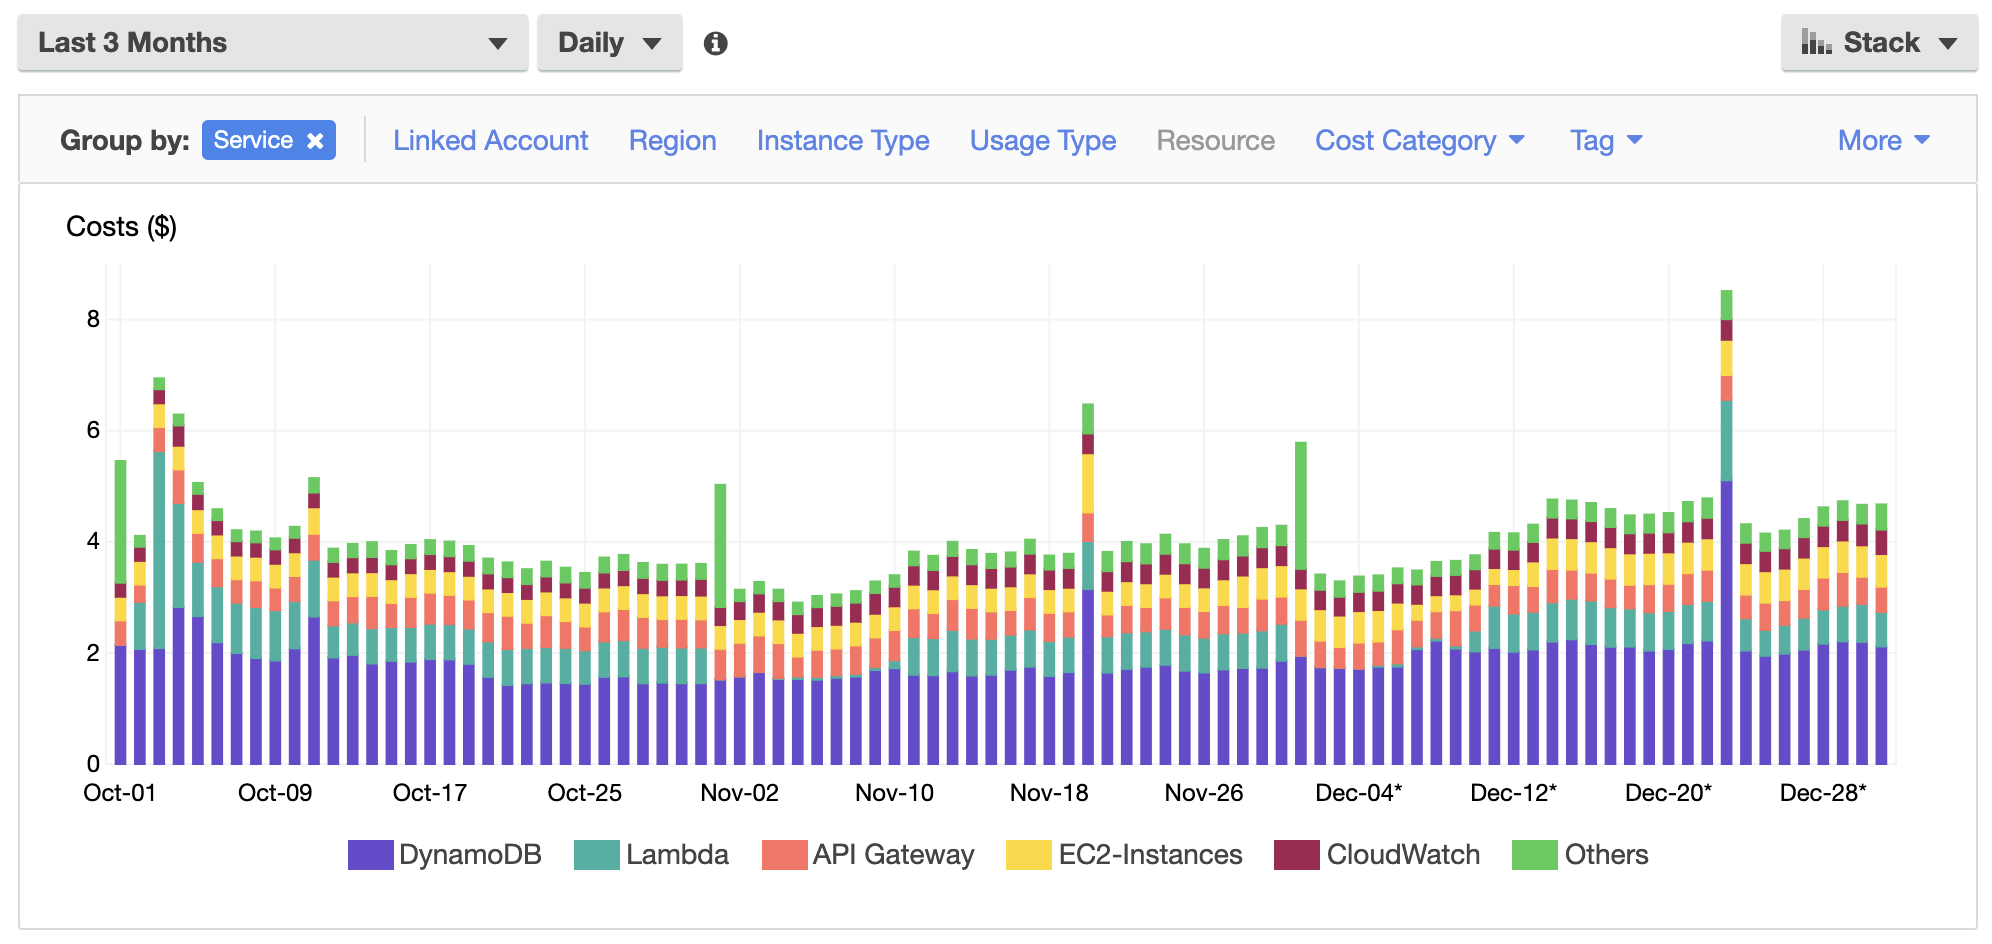
We can see which services cost how much, but to drill down on a project or department basis we need to add tags. This guide looks at how we can add those cost tags.
How do I start using tags for cost analysis?
Most AWS services support tags which are key-value-pairs that you define per resource (e.g. a REST API). An API for a management dashboard could have the following tags:
team: market-insights
project: profit-tracking
You can use tags for many more use cases than cost tracking. Check out the AWS tagging strategies for more examples.
Tags however won’t show up in the Cost Explorer unless you tell AWS to start tracking them. Go to AWS’ Billing service and in the lefthand navigation click on cost allocation tags. If you’ve already defined tags somewhere, then those will show up in a table below. If you haven’t done so, tag some resources now and come back when you’re done. Click refresh to update the tag table.
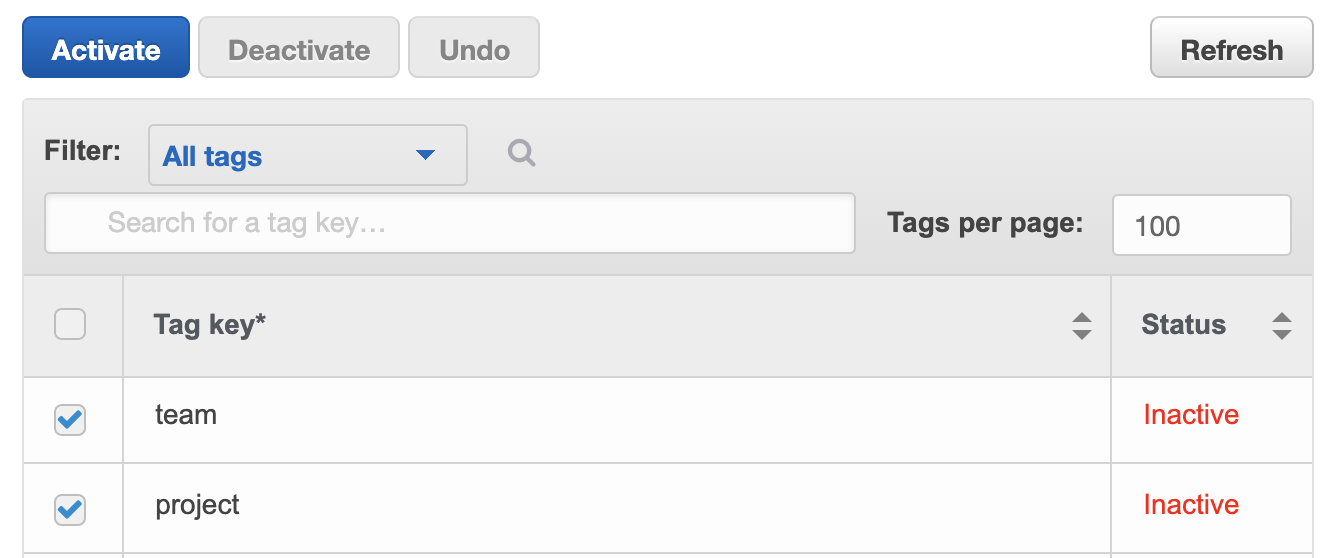
The next step is to tell AWS which tags are relevant for cost analysis. In our example it’s the two “team” and “project”. Select and activate them. Your selected tags will now start being tracked. You might not see the tags in the Cost Explorer diagram for a day or two.
Now you could go into every single service and resource, manually add some tags and wait for the details to show up. You will however notice that this is quite tedious and that’s what we’ll look into in the next chapter.
Is there a more efficient way?
Yes! If your deployment tooling (e.g. the serverless framework) supports tags, then add them and redeploy your resources where possible. This will make sure your tags remain even if you remove and redeploy your stack. It’s also easier to define tags per stack than per resource.
For all other situations I suggest an iterative API based approach. Under the assumption that insignificant costs may be neglected, we go through three steps:
-
Identify the most expensive services which are untagged
-
Use a script to tag all resources of that service
-
Collect data and repeat
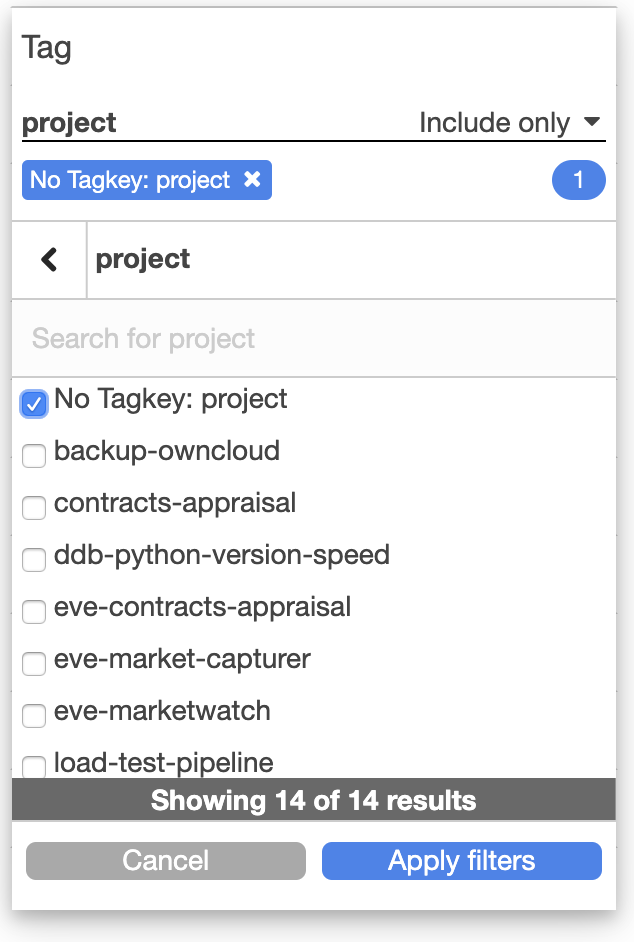
To identify expensive services which are untagged, we open the Cost Explorer and start by showing only those resources that are missing the tag.
Then we set the diagram’s granularity to Monthly, the type to Bar and group by Service. This gives us an overview of services which have not been tagged yet. You may also go for Daily, but should then shorten the time period to e.g. seven days.
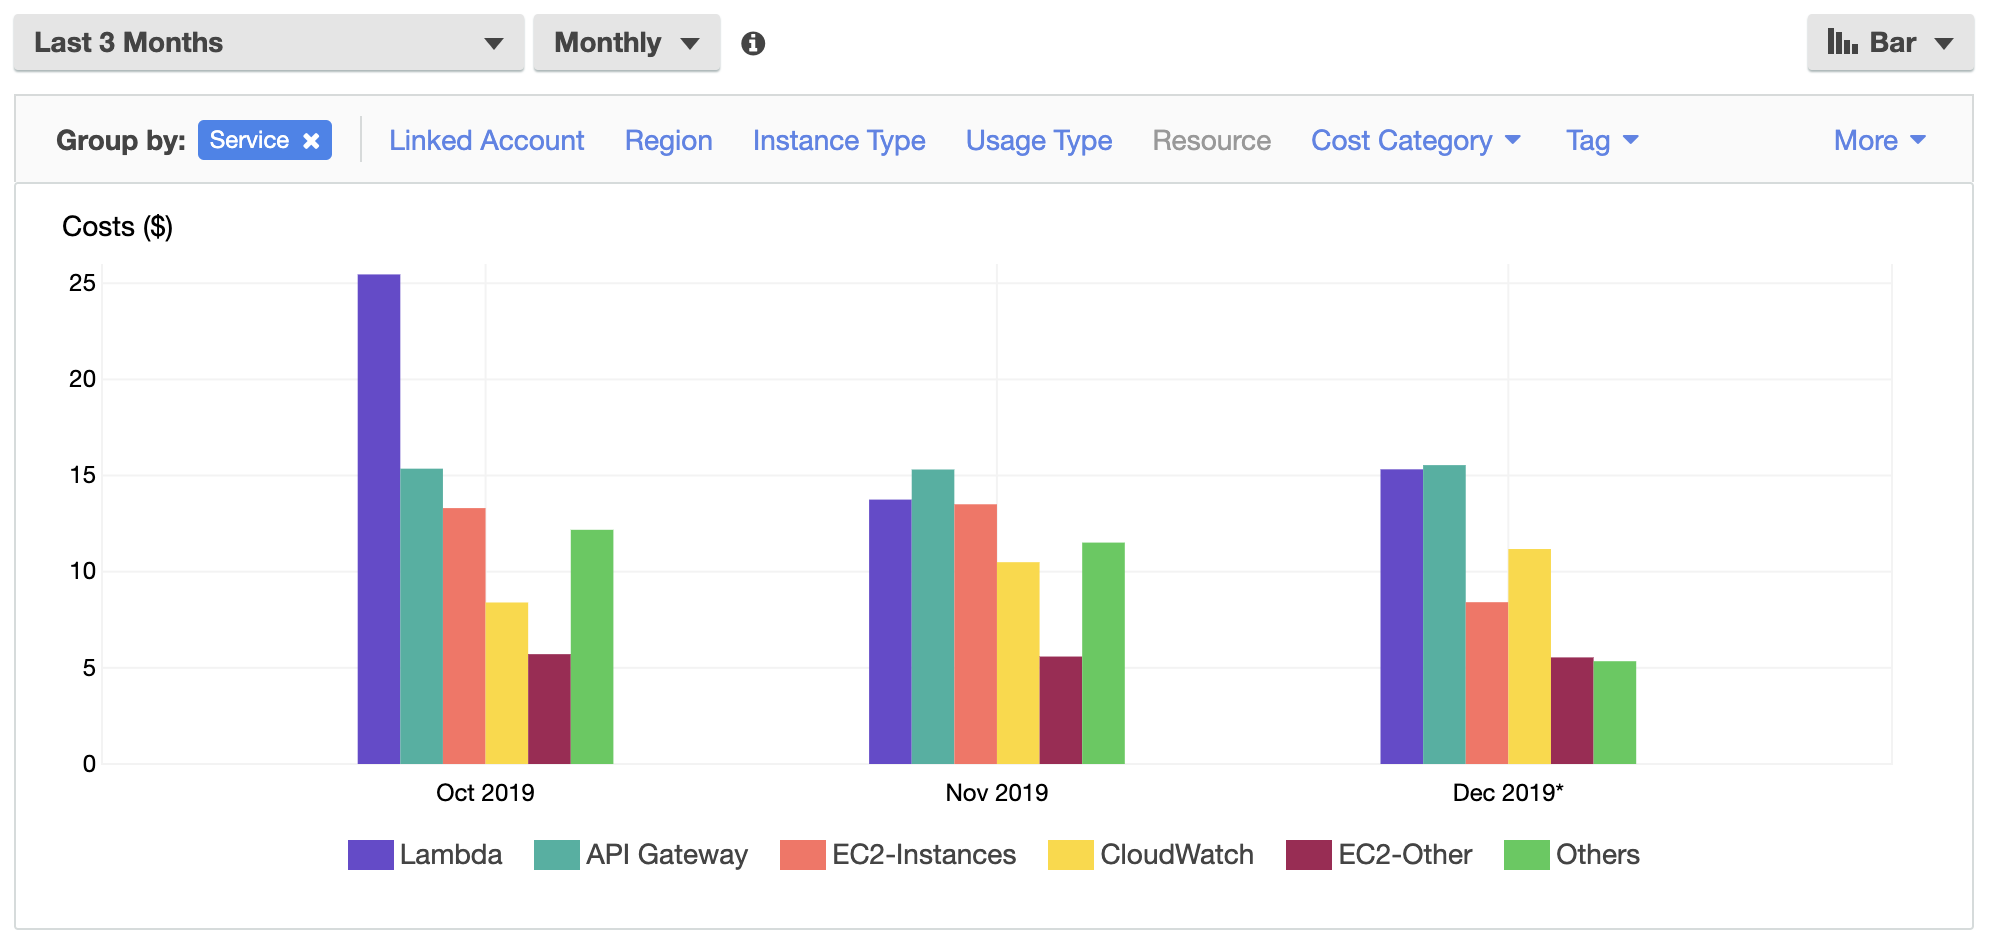
We can now pick one or two of those services and tag all the resources. We’ll start by picking Lambda and scripting with Python and with the boto3 library.
Using the API we can list all functions, list tags for each function and add our tags if they are missing. Here is a simple script:
import sys
import boto3

region = 'us-east-1'
target_tag = 'project'

client = boto3.client('lambda', region)

functions = client.list_functions().get('Functions', [])

for function in functions:
    tags = client.list_tags(Resource=function['FunctionArn']).get('Tags', [])
    if target_tag not in tags:
        print(f"Lambda {function['FunctionArn']} is missing tag {target_tag}")

        tag_value = None
        if 'aws-scheduler' in function['FunctionArn']:
            tag_value = 'serverless-scheduler'
        elif 'testing-mail' in function['FunctionArn']:
            tag_value = 'research'

        if tag_value is not None:
            client.tag_resource(Resource=function['FunctionArn'], Tags={target_tag: tag_value})
To figure out which names you have, just comment out the code starting at line 16. Then adjust the tag_value logic for your needs. Once you’ve run it for all your functions there should be no more uncategorised lambda costs anymore. It might take a day for Cost Explorer to show those changes, but then we can move on to the next service. Rinse and repeat until you tagged all your relevant cost drivers.
You can find an improved version of the script on GitHub.
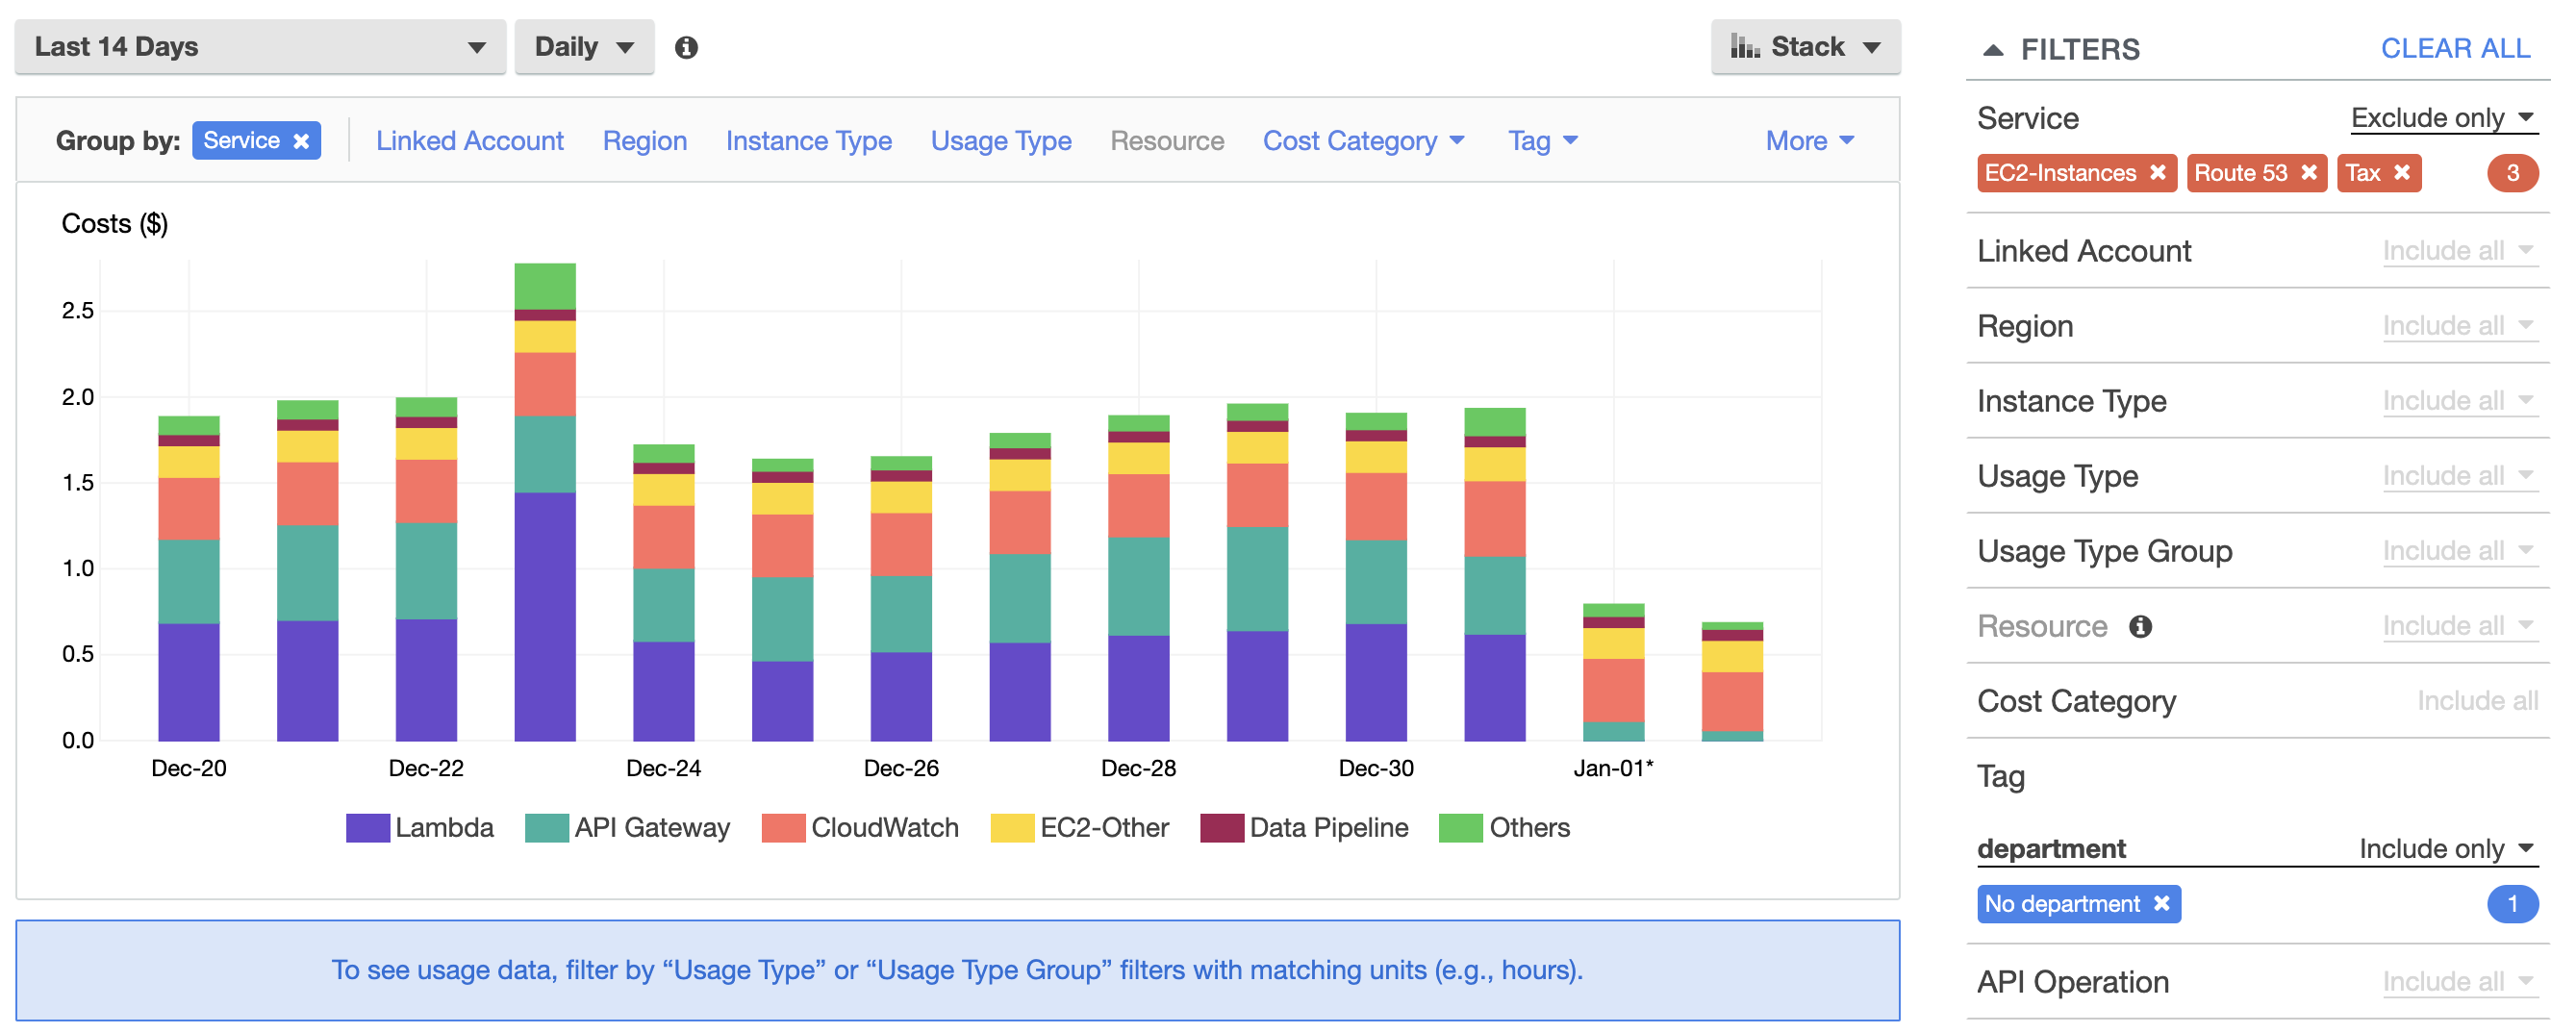
Here’s how my Cost Explorer view changed after running the script for Lambda. The last two days show that we have less than 1$/day untagged.
What’s next?
Repeat the process: The next cost driver would be CloudWatch.
There’s an improved version ready for you on GitHub. I will extend this tooling for more services over time. Do you find it useful? Do you need help or would like to contribute for other services? Let me know!
Haha yeah, it's in my backlog of things to catch up on after reinvent! Watch this space... patiently.. (lots to do after reinvent)
— Yan Cui (@theburningmonk) December 6, 2019
Further Reads
-
GitHub repository with improved tooling
-
Boto3 documentation for lambda (you can find all other services here too)
Enjoyed this article? I publish a new article every month. Connect with me on Twitter and sign up for new articles to your inbox!